Subframe
Subframe
• Removing and installing the right subframe is described here. Removing and installing the left subframe is identical.
• Bolts - 3 - have a left-hand thread.
• The subframe on a 2-door vehicle and 4-door vehicle is identical. The door on a 2-door vehicle has an additional cover.
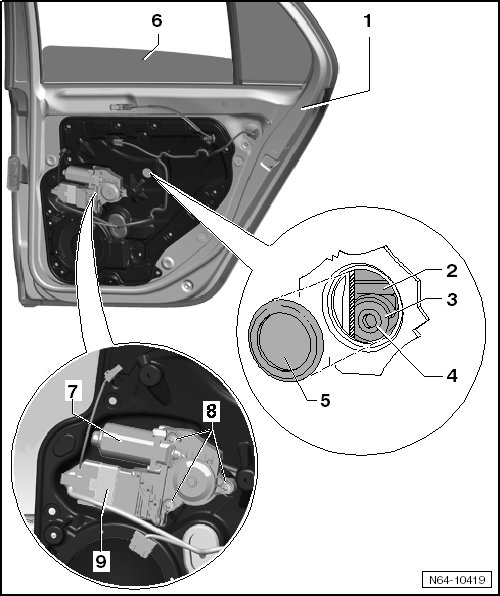
The window regulator, window regulator motor and the speaker are attached to the subframe.
The subframe can be removed only if the door window is detached at the clamping screws on the window regulator.
If it is not possible to drive down the door window by the electrical window regulator, first the exact cause of malfunction must be determined.
For this purpose, use (Vehicle Diagnostic Tester) to check DTC memory of Comfort system
If electrical malfunction is present, repair this malfunction first.
If there is an electrical malfunction due to window regulator motor, it can be unscrewed from subframe and door window can be slid by hand into the necessary work position.
Removing
- Remove rear door trim..
- Remove cover cap - 5 -.
- Lower door window until spreader pin - 4 - and spreader plug - 3 - are accessible in window regulator cut-out.
• If the work step is not possible due to a malfunction via the electrical window regulator, then the window regulator - 7 - can be disconnected - 8 -, in order to push the window down.
- Install a 5 mm bolt (approximately 70 mm long (2 3/4 inches) into the spreader pin - 3 - and pull bolt out of spreader plug - 4 -.
- Screw a 8 mm bolt (approximately 80 mm long) (3 inches) into spreader plug - 4 -.
• When screwing the bolt into spreader plug, do not use excessive force on the plug otherwise it may fall inside into the door.
- Pull the spreader plug - 4 - out of the window guide - 2 - and out of door window.
- Lift the door window - 1 - and secure it, for example, with adhesive tape.
• On one series of vehicles, up to 3 clips have been replaced by rivets.
• These rivets are being replaced by clips again at installation.
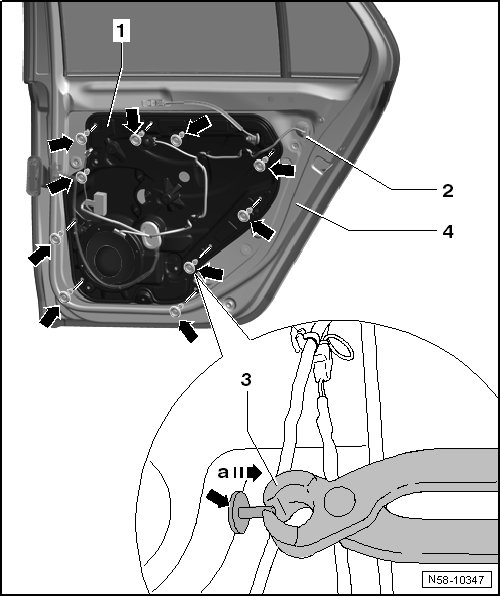
- Disconnect the connectors on the door lock - 2 -.
- Remove the clips - arrows - with pliers - 3 - - arrow a -.
- Open the catches - arrow a - and pull off the protective sleeve - 1 -.
- Open the locking mechanism on the connector by pivoting it downward - arrow b - and disconnect the connector.
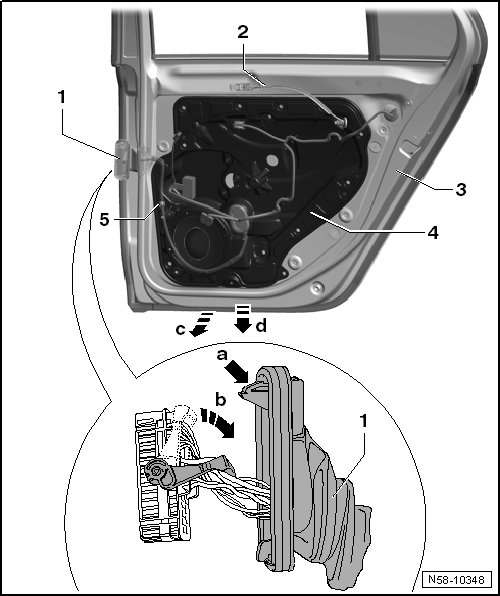
- Remove the subframe - 4 - from the door - arrow c -.
- Pull the cable - 2 - out of the subframe.
- Remove the subframe - 4 - - arrow d - from the door - 3 -.
- Remove the wiring harness - 1 - from the mount - 5 -.
- When pulling out subframe - 1 -, guide out wiring harness - 1 - accordingly.
Installation
• If the door window was not removed, then install the spreader plug and the expanding pin into the door window before installing the subframe.
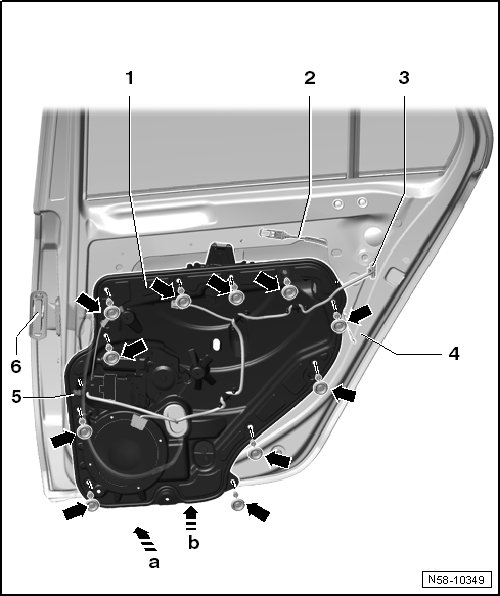
- Insert subframe upward - arrow a - at an angle into door.
- Pull the connector - 6 - through the door - 4 - and secure the wire holder - 5 -.
- Pull the cable - 2 - through the subframe. Make sure the grommet fits correctly.
- Push the subframe - 1 - on the bottom of the door - arrow b -.
- Connect the connectors - 3 -.
• Press the subframe firmly against the door when installing the clips.
• Gently push in the pins on the clips so that the subframe seal fits correctly.
• It will be difficult to install the clips with the subframe is not pressed firmly against the door.
• Also, the clips will get caught and seal will not fit correctly.
• On one series of vehicles, up to 3 clips have been replaced by rivets.
• These rivets are being replaced by clips again at installation.
- Press the subframe firmly - 1 - against the door - 4 -.
- Mount the clips - arrows - and press the pins in.
- Install the door window. Refer to => [ Rear Door Window ] Rear Door Window
- Connect connectors - 2 -.
- Continue by performing the steps used in removal in reverse order.
• A function test must be performed before door trim is installed.