Steering Gear
Steering Gear
Special tools, testers and auxiliary items required
• Torque wrench (V.A.G 1331)
• Torque wrench (V.A.G 1332)
• Engine/transmission jack (V.A.G 1383 A)
• Ball joint puller (3287 A)
• Vehicle Diagnosis, Testing and Information System (VAS 5051)
Removing
- Turn the steering wheel to the straight-ahead position and remove the ignition key so that the steering wheel lock engages.
Vehicle with "Keyless Access" Keyless Locking and Starting System
- Switch the ignition off and open the driver's door so the steering wheel lock locks.
Continuation for All Vehicles
- Disconnect battery.
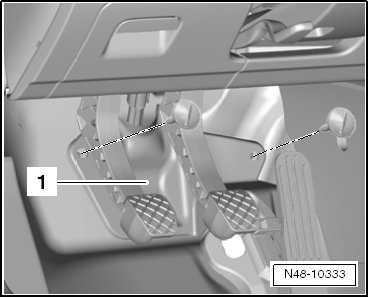
- Remove the footwell trim panel - 1 -.
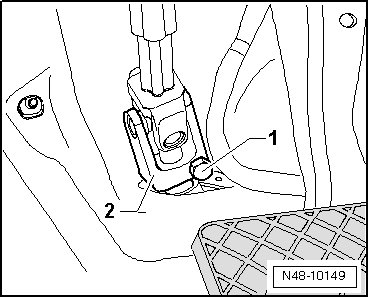
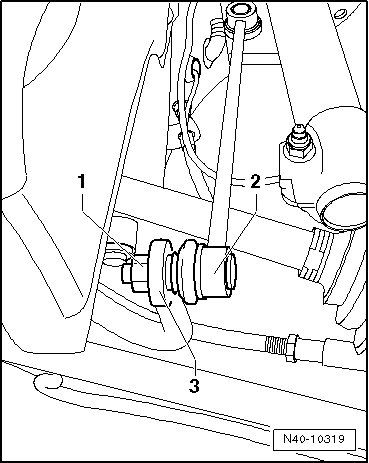
- Remove the bolt - 1 - and remove the universal joint - 2 - from the steering gear.
- Remove the front wheels.
- Loosen nut of track rod ball joint, but do not unscrew yet.
To protect thread, screw nut on pin a few turns.
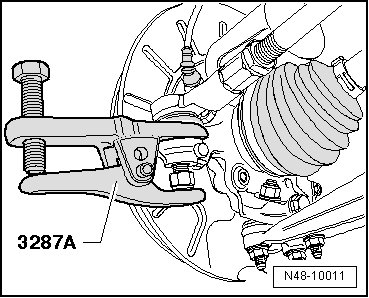
- Press tie rod end off of wheel bearing housing using (3287 A).
- Remove the lower noise insulation.
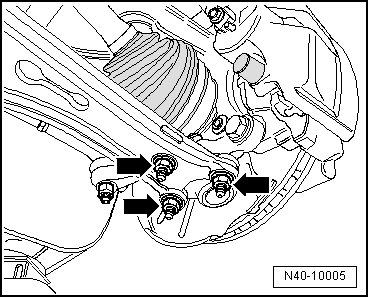
- Remove the right and left nuts - 1 - from the coupling rods - 2 -.
- Remove the coupling rods - 2 - from the stabilizer bar - 3 -.
- Remove the nuts - arrows -.
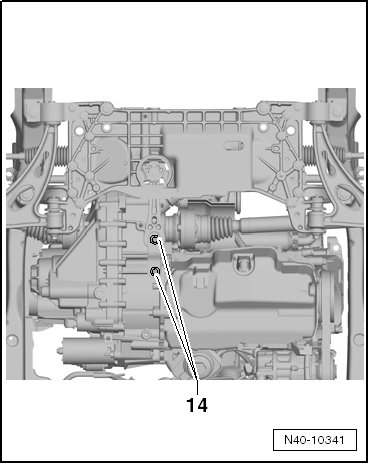
- Remove pendulum support from transmission, unscrew bolts - 14 - to do so.
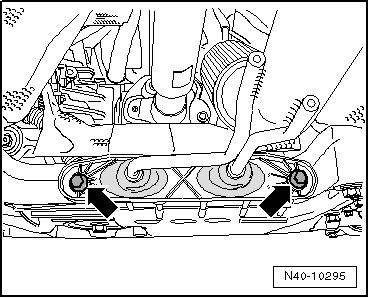
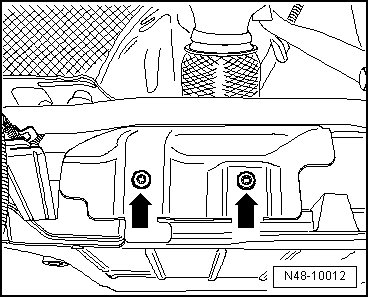
- Remove exhaust system bracket from subframe - arrows -.
- If equipped, remove the heat shield bolts - arrows -.
- If equipped, remove the subframe heat shield.
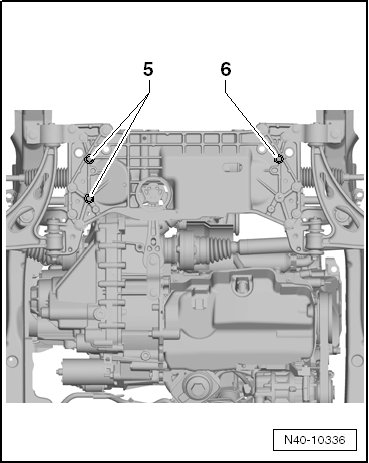
- Remove the bolts - 5 - and - 6 - on the steering gear.
- Remove the stabilizer bar bolts - 7 - and - 8 -.

- Locate the subframe and consoles. Refer to => [ Subframe and Consoles, Securing ] Front Suspension.
- Disconnect the connector for the service interval extension to the oil pan.
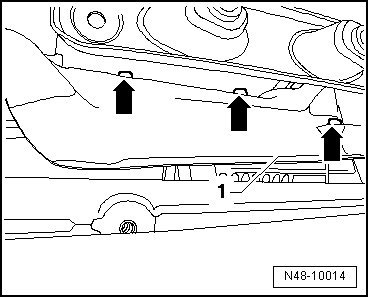
- Place the (V.A.G 1383 A) under the subframe.
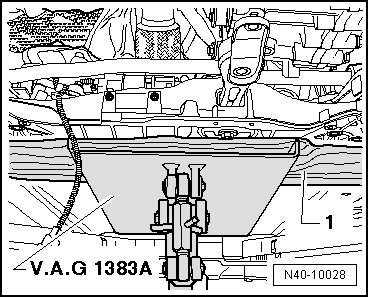
- Place a block of wood - 1 -, for example, between (V.A.G 1383 A) and the subframe.
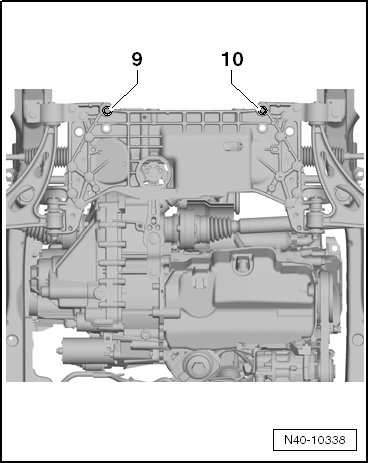
- Remove the bolts - 9 - and - 10 - and slightly lower the subframe with the brackets. Observe electrical wires when doing this.
- Remove heat shield - 1 - above exhaust system.
- Remove bolts - arrows -.
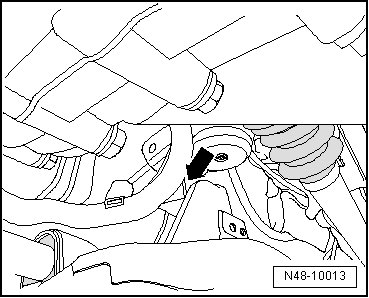
- Remove cable guide from subframe - arrow -.
- Unclip all other cable mounting points on steering gear.
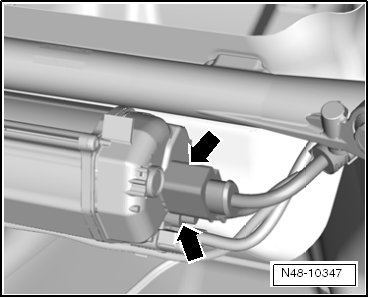
- Disconnect the connectors - arrows - from the steering gear.
- Carefully lower subframe using (V.A.G 1383 A).
- Now, lift the stabilizer bar - 1 - toward the front, over the subframe - 2 - and down, while turning the stabilizer bar slightly.

- Lift down steering gear from subframe.
- Set down steering gear as depicted in the illustration.
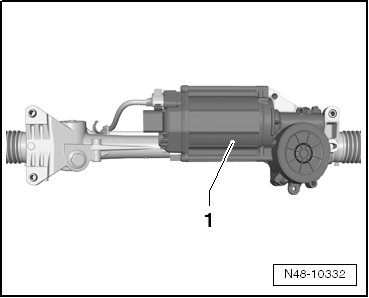
This prevents damage to the control module - 1 -.
Installing
Install in reverse order of removal.
The steering gear threaded sleeves must be seated in the console holes.
- Connect the connectors - arrows -. They must audibly engage.
• Coat seal on steering gear with lubricant, e.g. soft soap, before installing steering gear.
• After attaching steering gear to driveshaft, make sure that seal on steering gear is positioned to mounting plate without kinks and opening to foot well is sealed correctly. Ingress of water and/or noises may be the result.
• Make sure sealing surfaces are clean.
Before fastening the bolts for subframe, position steering gear on subframe and fasten bolts for steering gear and stabilizer.
- Clamp off the electrical connections to the steering gear.
- Install lower noise insulation.
• Make sure that the ball joint boot is not damaged or twisted.
- Bolt universal joint to steering gear.
- Connect battery.
- Perform the basic setting for the steering angle sensor (G85) using the (VAS 5051).
If a new steering gear was installed, then the electromechanical steering must be adapted with the (VAS 5051).
- Adapt the electromechanical steering with the (VAS 5051).
Chassis
Electromechanical power steering
01 - OBD-capable system
Electro-mechanical power steering
Functions
Adapting electro-mechanical steering
After installation, position of steering wheel must be checked with a road test.
If steering wheel is at an angle or a new steering gear was installed, vehicle must be aligned.
- Align vehicle. Refer to => [ Wheel Alignment ] Wheel Alignment.
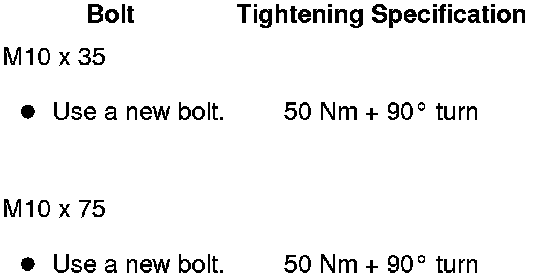
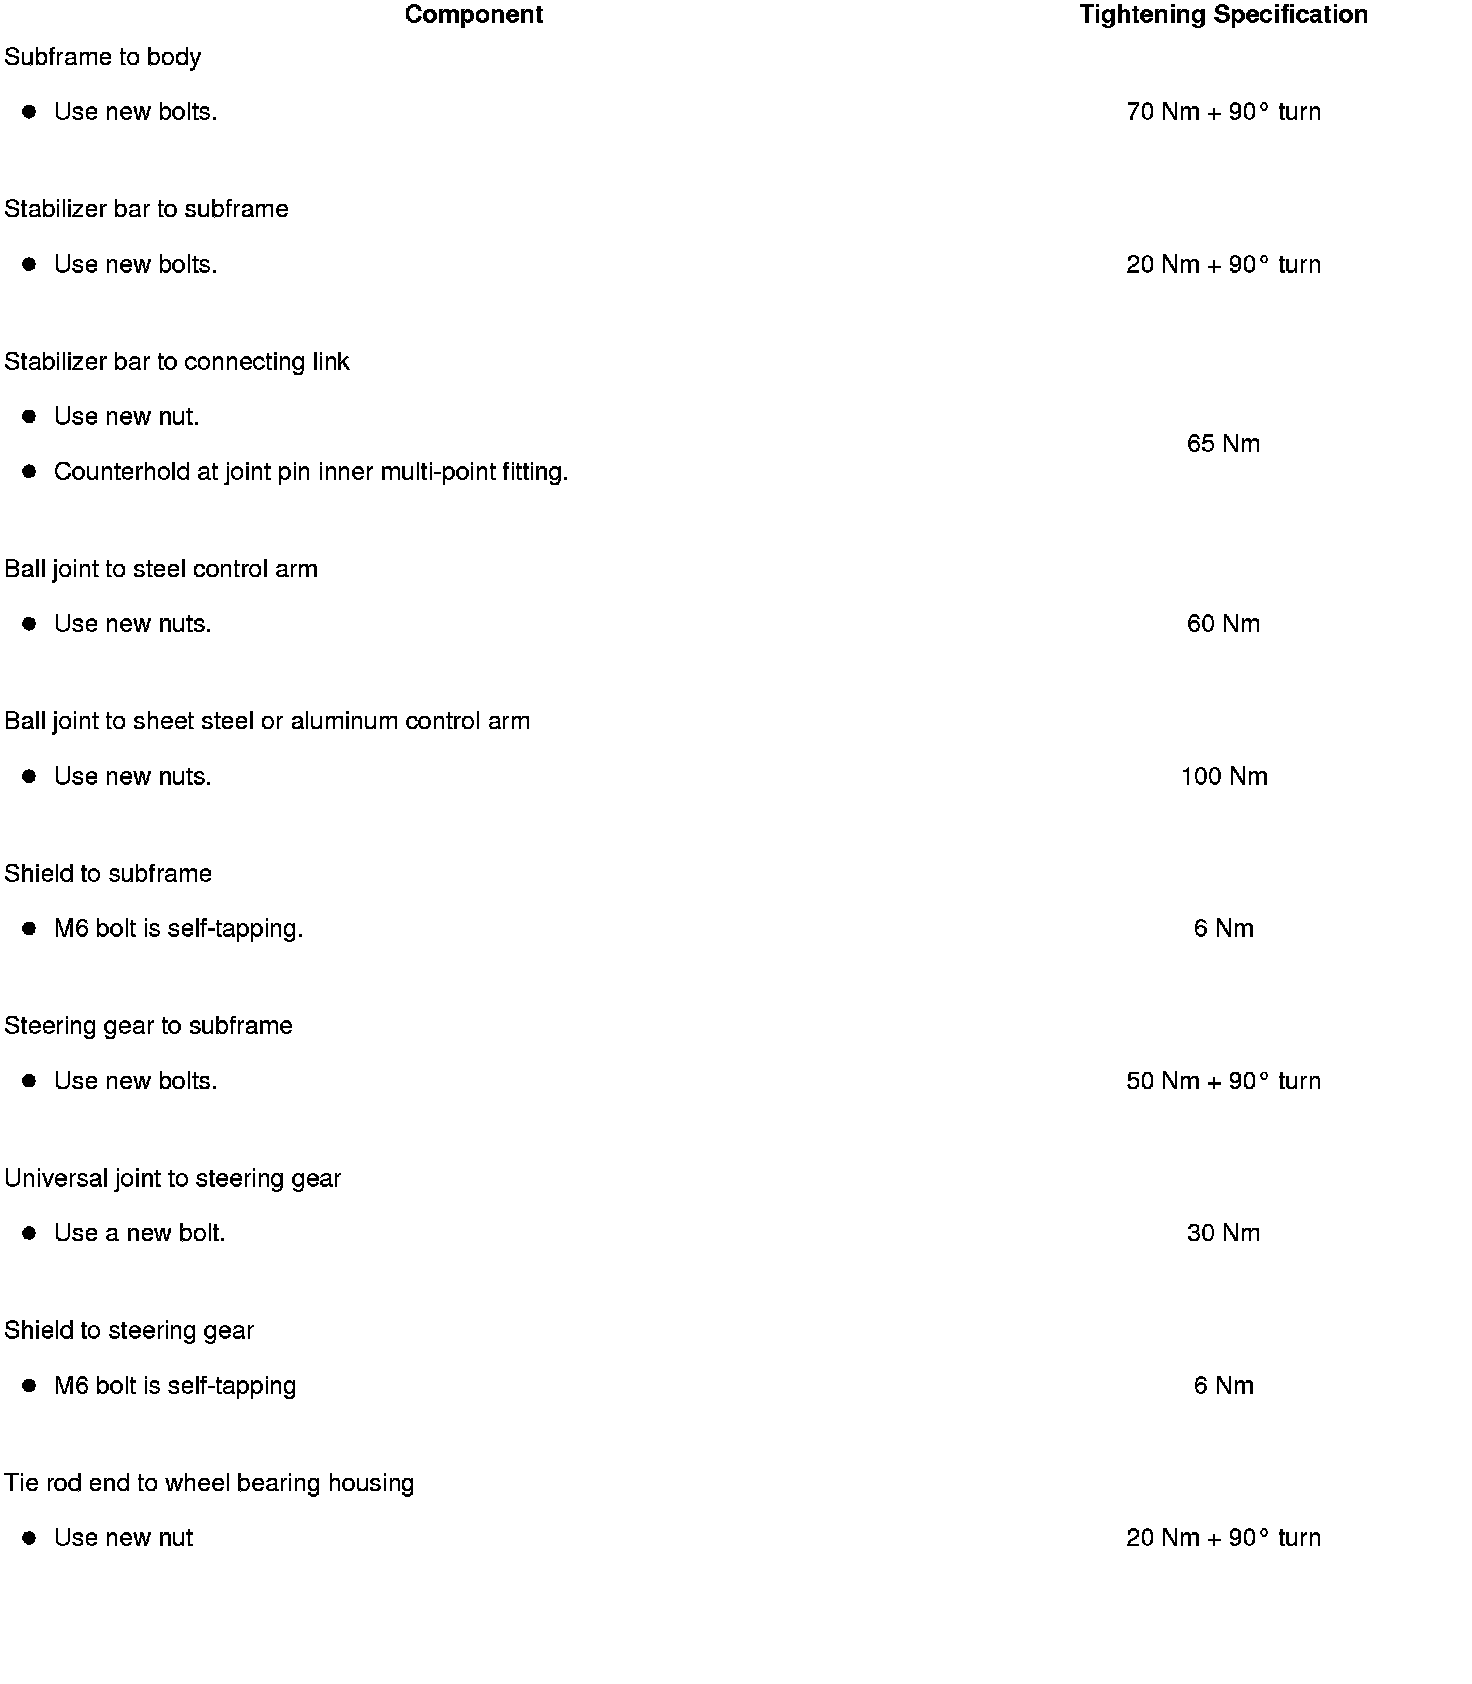
Tightening Specifications
Tightening Specifications, Pendulum Support to the Transmission