Front Door
Door
Special tools, testers and auxiliary items required
• Door Adjusting Wrench (3320)
• Box Wrench (3320/3)
• The following describes removing and installing the right door only. Removing and installing the left door is identical.
Removing
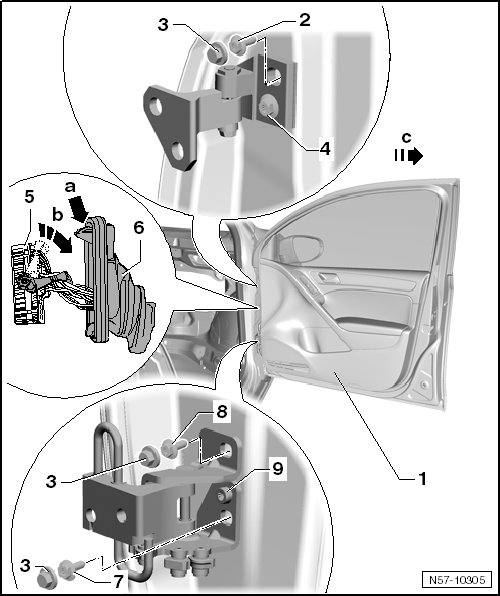
- Press on the catch - arrow a - and remove the boot - 6 - from the A-pillar.
- Move the locking lever - 5 - downward - arrow b - and disconnect the connector from coupling station.
- Remove the caps - 3 - from the screws.
- Remove screws- 2, 7 and 8 - using (3320) and (3320/3) from hinge.
- These screws - 4 and 9 - are actually guide screws and remain on the hinge.
- Pull the door - 1 - off the guide screws - 4 and 9 - in - direction of arrow c -
Installation
To install, perform the steps used for removal in reverse order.
• Screws - 2, 7 and 8 - must always be replaced.
- Bolts - 2, 7 and 8 - tightening specification: 38 Nm.
- Make sure the front door gap dimension is correct.