Fuel Tank
Fuel Tank
Special tools, testers and auxiliary items required
• Torque Wrench (5-50 Nm) (V.A.G 1331)
• Engine-/Gearbox jack (V.A.G 1383 A)
Removing
- Read the safety precautions before starting. Refer to => [ Safety Precautions ] Safety Precautions.
Follow the guidelines for clean working conditions. Refer to => [ Clean Working Conditions ] Clean Working Conditions.
• To perform this procedure, the ground cable must be disconnected from the battery. See if a coded radio is installed. If so, obtain the anti-theft code beforehand.
• When lowering, the fuel tank must be carefully guided to prevent damages.
- Turn off the ignition and disconnect the ground cable from the battery.
- Fold the rear seats forward.
- Loosen the carpet under the seats and fold it back.
- Remove the cover from the fuel delivery unit.
- Disconnect the connector from the flange.
- Remove the fuel filler door unit.
- Drain the fuel tank. Refer to => [ Fuel Tank, Draining ] Procedures.
- Remove the rear muffler.
- Remove the rear right wheel housing liner.
- Remove the fuel filler tube bolts - 1 -.
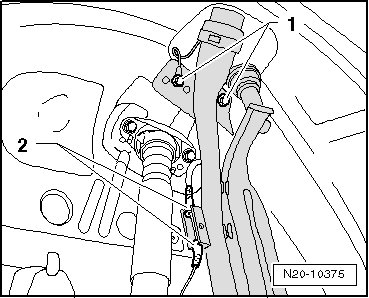
- Unclip the wire from the filler tube bracket - 2 -.
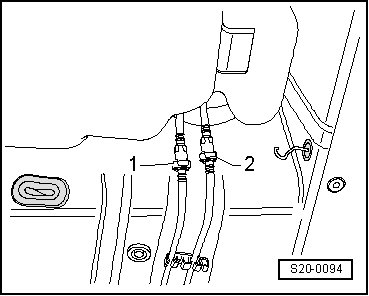
- Disconnect the fuel lines from the fuel tank. Disconnecting the couplings. Refer to => [ Coupling, Disconnecting ] Coupling, Disconnecting.
- Remove the retainers and remove the heat shield for the fuel tank.
- Support the fuel tank using the engine-/gearbox jack (V.A.G 1383 A).
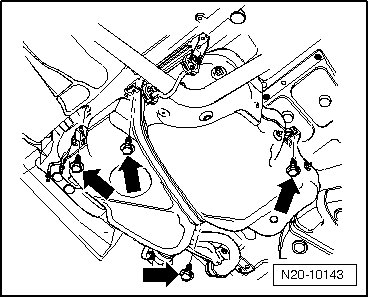
- Remove the bolts - arrows - from the fuel tank.
- Slowly lower the fuel tank and pull it forward.
- Tip the fuel tank so that it clears the rear subframe.
Installing
Install in the reverse order of removal. Note the following:
• Make sure the ventilation and fuel lines are not kinked when installed.
• Make sure the fuel hoses are secure.
• Do not interchange the supply and return lines (the return line is blue or with a blue mark, the supply line is black).
• Clip in the supply and return lines at the fuel tank.